
Water is one of the most destructive forces a homeowner can face. Water damage and freezing account for roughly one in four residential property claims, averaging over $13,000 per incident. Worse yet, moisture rarely announces itself immediately. While a burst pipe demands urgent action, a slow drip behind a shower wall, a cracked roof vent boot, or damp soil pressing against a basement wall can silently rot framing and subfloors for months. Once building materials stay wet for 24 to 48 hours, mold spores colonize drywall and insulation, turning a minor oversight into costly remediation.
Preventing water intrusion is far cheaper than repairing structural rot. Working systematically from your roofline to your basement floor—and maintaining the plumbing and climate-control equipment in between—eliminates common moisture entry points before severe weather strikes.
Seal the Upper Exterior Envelope Against Rain and Wind-Driven Moisture
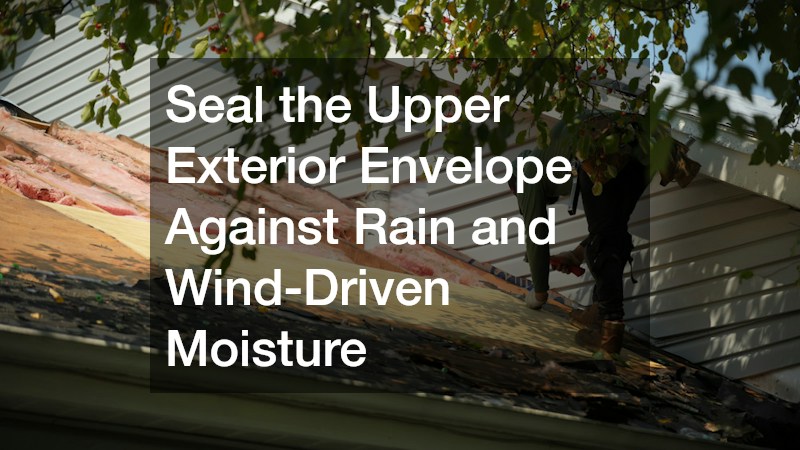
Your roof, gutters, and cladding form your home’s primary shield against rain, sleet, and snow. A 1,500-square-foot roof sheds over 900 gallons of water during a single inch of rain. If that upper drainage system fails, runoff spills directly onto fascia boards, wall cavities, and perimeter soil, accelerating exterior wood decay and basement seepage.
Clogged gutters are among the top culprits behind preventable exterior rot, forcing rainwater to back up under roof eaves and soak behind siding. Routine gutter care keeps runoff moving safely away from your foundation perimeter:
- Clean channels twice a year: Remove leaves, pine needles, twigs, and shingle grit in late spring after seed pods drop and again in late autumn after leaves fall.
- Verify proper gutter slope: Pitch gutters one-quarter inch per ten feet toward each downspout so standing water never pools in the trough or strains brackets.
- Extend every downspout: Add rigid aluminum or buried extensions discharging runoff six to ten feet from exterior walls, and confirm splash blocks tilt away from the house.
Beyond keeping gutters clear, inspect your roof and siding regularly because wind, hail, and UV rays degrade exterior materials—especially around chimneys, skylights, dormers, and plumbing vents where surfaces meet. Wind-driven rain also blows sideways against walls, exploiting small gaps where cladding meets corner trim, utility boxes, dryer vents, and hose bibs:
- Scan the roof from the ground: Use binoculars after severe storms to spot lifted shingle tabs, missing mineral granules, or bent ridge vents.
- Check the attic during heavy rain: Bring a flashlight into your attic during daytime storms to spot dark water trails on rafters, damp insulation, or daylight around vent stacks.
- Address flashing failures early: Rubber pipe boots typically crack after ten to fifteen years of sun exposure. Hiring a qualified residential roofing company to reseal flashing, replace brittle boots, or repair wind-damaged shingles stops leaks before they stain ceilings or rot roof decking.
- Renew vertical caulk joints: Scrape away cracked or shrunken caulk along vertical siding trim boards and apply paintable polyurethane or siliconized acrylic sealant, leaving bottom horizontal edges of lap siding uncaulked so trapped condensation drains naturally.
- Fix damaged cladding promptly: Warped vinyl panels, split fiber-cement planks, or soft spots near the bottom of wood siding indicate moisture behind the weather barrier. Bringing in experienced siding repair services restores the exterior envelope and protects sheathing from rot.
Eliminate Hidden Leaks Around Windows and Exterior Doors
Windows and exterior doors interrupt your weather barrier, making frames, sills, and flashing frequent leak points. Even hairline gaps around an exterior casing channel wind-driven rainwater into wall insulation and framing studs, where moisture lingers unseen.
Sunlight and seasonal temperature swings shrink, harden, and crack exterior caulk. Inspecting openings every three to five years seals perimeter joints against driving rain, while interior checks help you spot failing window assemblies before surrounding drywall rots:
- Clean out old sealant completely: Remove failing exterior caulk with a plastic scraper and wipe joints with isopropyl alcohol so fresh sealant bonds tightly.
- Apply 100 percent exterior silicone: Run a continuous bead along side casings and top trim transitions, leaving bottom sills uncaulked where designed to drain.
- Clear window weep holes: Clear dirt and dead insects from exterior bottom-track weep holes on sliding and double-hung windows using thin wire or compressed air so rainwater drains outside instead of overflowing onto interior sills.
- Watch for fogging between glass panes: Persistent condensation trapped inside double-pane glass means the perimeter seal has failed, letting humid air inside.
- Check for peeling paint or swollen trim: Bubbling latex paint, dark water stains, or soft wood along interior sills signal active leaks around the sash or frame.
- Replace warped frames proactively: Frames that bow out of square lose contact with weatherstripping. Planning timely window replacements eliminates chronic sill leaks, protects drywall from mold, and improves indoor comfort.
Keep Groundwater Out of Your Basement and Crawl Space

Below-grade water problems develop whenever surface runoff saturates surrounding soil and builds hydrostatic pressure against subterranean walls and concrete slabs. Effective below-grade protection combines smart exterior grading with reliable mechanical drainage.
Drainage starts with yard contour. Because soil settles toward a house over time, poor perimeter grading funnels rainstorms directly against lower walls. Meanwhile, basements and crawl spaces depend on working sump pumps and sound masonry walls during spring thaws and heavy downpours:
- Establish a positive soil slope: Slope ground down at least six inches over the first ten feet from exterior walls using dense clay-rich topsoil rather than porous sand or gravel.
- Keep mulch below siding lines: Leave six inches of exposed masonry between garden mulch beds and the bottom edge of siding so damp organic material never wicks moisture into framing or invites wood-destroying pests.
- Cover below-grade window wells: Add polycarbonate window-well covers and keep gravel well drains at the bottom clear of leaves and silt.
- Test your sump pump every quarter: Pour five gallons of water into the sump pit to confirm the float switch triggers immediately, the check valve closes cleanly, and the discharge pipe carries water outside.
- Install a battery backup system: Storms often cut electrical power as groundwater peaks; a marine-grade battery backup pump keeps water moving during outages.
- Evaluate wall cracks carefully: Vertical hairline shrinkage cracks in poured concrete can often be sealed with DIY polyurethane foam kits. However, horizontal fractures, stair-step cracks in block walls, or inward bowing require prompt foundation repairing to relieve soil pressure and prevent flooding.
Stop Indoor Condensation and Drip-Pan Overflows From Cooling Equipment
Not all water damage starts outdoors. During humid summers, central cooling equipment pulls gallons of moisture from indoor air daily—and if that condensate cannot drain freely, it overflows onto ceilings, attic floors, and utility closets.
As warm air passes over cold evaporator coils, moisture condenses into a collection pan and exits through a narrow PVC drain line where algae and mineral sludge easily form blockages. Restricted airflow or low refrigerant can also freeze an evaporator coil solid, which then melts all at once when the unit cycles off and overwhelms the drain pan:
- Flush the condensate line annually: Pour one cup of distilled white vinegar down the T-shaped PVC access vent near your air handler each spring to kill algae and clear biofilm buildup.
- Inspect auxiliary safety pans: If your air handler sits in an attic or above a finished ceiling, check the secondary safety pan underneath for standing water, debris, or rust spots.
- Test float safety switches: Verify that inline float safety switches shut off cooling before a clogged pipe overflows onto finished drywall below.
- Change air filters every 60 to 90 days: Clean pleated filters maintain steady airflow across the coil and keep dust from turning into muddy sludge inside drain pans.
- Book spring maintenance visits: Scheduling seasonal HVAC services lets a technician clean dirty coils, inspect aging drain pans for hairline cracks, and verify that air conditioning systems hold proper refrigerant charge before peak humidity arrives.
Protect Pipes and Heating Equipment During Freezing Weather

Winter brings distinct plumbing and appliance hazards. Freezing water expands inside supply pipes by roughly nine percent, generating immense pressure that splits copper, CPVC, or PEX lines and releases hundreds of gallons per hour upon thawing.
Preparing vulnerable supply lines in late autumn prevents common cold-weather pipe bursts, while servicing modern heating equipment ensures condensation and humidification systems drain safely all winter:
- Winterize outdoor faucets: Disconnect garden hoses before the first hard freeze, close interior shutoff valves to exterior spigots, and open outdoor faucets to drain remaining water from the line.
- Wrap pipes in unheated zones: Slide closed-cell foam pipe sleeves over supply lines in crawl spaces, attics, garages, and exterior rim joists.
- Circulate warm air during extreme cold: During sub-freezing nights, open vanity cabinet doors under exterior-wall sinks and let faucets drip slowly to relieve internal line pressure.
- Check condensing furnace drains: High-efficiency condensing furnaces extract extra heat from exhaust gases, producing acidic condensate that drains through clear vinyl tubing and an acid-neutralizing canister. Inspect tubes for kinks, clogs, or mineral crust.
- Maintain whole-home humidifiers: Bypass and fan-powered humidifiers mounted on ductwork rely on water supply lines, solenoid valves, and drain tubes. Replace calcified evaporator pads each autumn so water flows evenly without overflowing onto utility floors.
- Fix heating leaks immediately: Water pooling beneath your heating cabinet or dripping from flue joints points to a cracked collector box or faulty condensate pump. Arranging timely furnace repairs stops moisture damage and protects internal controls from corrosion.
Prevent Plumbing Backups and Slow-Drain Overflows
Pressurized supply lines and gravity-fed drainpipes operate nonstop behind walls and beneath floors. Most catastrophic indoor plumbing floods stem from predictable appliance failure points or gradual sewer blockages that give off early warning signs before overflowing.
Combining smart leak detection with disciplined drain habits protects your home against sudden supply-line bursts and messy wastewater backups:
- Place Wi-Fi water sensors in high-risk spots: Put battery-powered Wi-Fi leak sensors under sinks, behind toilets, inside water heater drain pans, and behind washers for instant phone alerts.
- Upgrade washing machine hoses: Replace standard rubber supply hoses every five years with burst-resistant braided stainless steel hoses.
- Maintain your water heater: Flush sediment from tank water heaters annually to prevent corrosion, test temperature-and-pressure relief valves, and replace aging tanks at eight to twelve years old.
- Label the main water shutoff valve: Tag your main water shutoff valve so every household adult knows where it is located and how to close it quickly in an emergency.
- Keep grease and wipes out of pipes: Dispose of cooled cooking grease in sealed trash containers rather than kitchen drains, and never flush wipes, paper towels, or hygiene products—even items labeled flushable.
- Watch for main-line warning signs: Gurgling toilets when a nearby sink drains, slow-emptying tubs across multiple bathrooms, or water rising in basement floor drains signal main sewer restrictions.
- Clear stubborn blockages professionally: Tree roots and hardened grease require specialized tools. Calling reputable drain cleaning contractors for a fiber-optic camera inspection and high-pressure hydro-jetting clears main sewer lines thoroughly before raw wastewater backs up indoors.
Safeguard Interior Floors and Subfloors in High-Moisture Rooms

Kitchens, bathrooms, laundry rooms, mudrooms, and basements endure daily splashes, wet boots, and appliance drips. Installing solid hardwood in below-grade basements or wet bathrooms invites cupping, warping, and hidden mold growth underneath boards.
Choosing moisture-tolerant surface materials—and paying close attention to subfloor preparation and perimeter sealing—keeps everyday water exposure from destroying wooden subfloors beneath your feet:
- Pick true waterproof surfaces: Porcelain tile, sealed architectural concrete, and rigid-core vinyl plank resist standing water without swelling or delaminating.
- Test concrete slabs before buying: Concrete transmits moisture vapor from soil below. Reputable flooring companies perform quantitative pinless or calcium chloride moisture tests on concrete slabs before recommending products rated for damp spaces.
- Install continuous vapor barriers: Lay a 6-mil polyethylene vapor barrier over concrete slabs and tape every seam with moisture-resistant tape before installing floating planks.
- Seal subfloor joints and wet edges: Tape plywood subfloor seams in bathrooms and kitchens, leave manufacturer-specified expansion gaps along walls so planks never buckle, and finish wet perimeters with waterproof PVC baseboards and flexible silicone caulk around tubs, showers, and thresholds. Ensuring careful flooring installation locks out surface spills and preserves the structural subfloor beneath.
Protecting your home from water damage does not require an expensive renovation or constant worry. Instead, it relies on small, repeatable habits timed ahead of seasonal weather shifts so minor wear never escalates into soaked drywall or rotted framing.
Organize these tasks into four quarterly calendar reminders to keep the workload manageable year-round: check gutters, yard grading, sump pumps, and cooling drains in spring; inspect window caulk, weep holes, and smart leak sensors in summer; clear fallen leaves, insulate pipes, and service heating gear in autumn; and monitor attic rafters and exposed plumbing during winter freezes. A few focused hours each season preserves your home’s structure, prevents mold growth, and safeguards your property value and peace of mind.